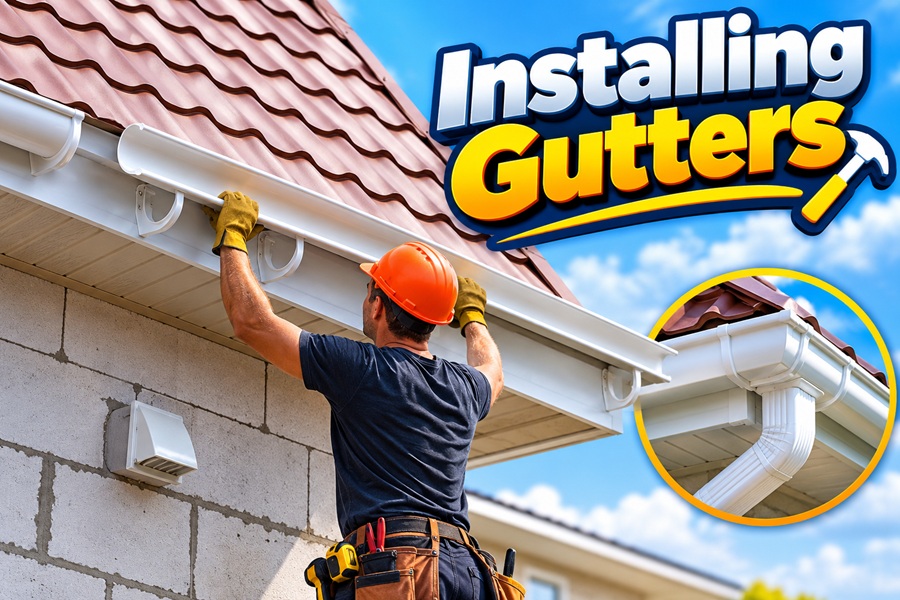
Gutters do an important job that homeowners often overlook until rainwater begins spilling over the roof edge. Uncontrolled runoff can erode soil, stain siding, damage landscaping, and allow water to collect near the foundation. Installing gutters gives rainwater a defined path from the roof into downspouts and away from vulnerable areas around the house.
A straightforward installation may be manageable for a homeowner with suitable tools and experience working safely on an accessible, single-story building. The process involves measuring the roofline, selecting compatible materials, planning the slope, positioning hangers, fitting gutter sections, and directing water to an appropriate discharge point. More complicated roofs, multi-story homes, and installations involving structural repairs often justify professional help. Accurate measurements, secure fastening, and safe working practices matter just as much as choosing the right gutter material.
Installing Gutters at a Glance
| Step | Task | Why it matters |
|---|---|---|
| 1 | Inspect the roof edge | Confirms the mounting surface is sound |
| 2 | Measure the roofline | Helps calculate material quantities |
| 3 | Choose the gutter system | Ensures suitable performance and compatibility |
| 4 | Plan the slope | Directs water toward outlets |
| 5 | Mark the installation line | Keeps the gutter aligned |
| 6 | Fit hangers and sections | Provides secure support |
| 7 | Install corners and outlets | Connects the drainage route |
| 8 | Attach downspouts | Carries water away from the roof |
| 9 | Test the system | Reveals leaks and drainage problems |
What You Need Before Installing Gutters
Begin by inspecting the roof edge and the surface where the gutter will attach. Look for loose boards, water stains, peeling paint, rot, and signs that the old gutter has pulled away from the building.
Do not attach a new system to damaged fascia without addressing the underlying problem. Fascia is the board or finishing surface along the roof edge that commonly supports gutter brackets. If it is rotten or loose, the new system may not remain secure.
Choose the gutter material and profile based on the building and local conditions. Aluminum is popular for residential projects because it is lightweight and available in different finishes. Vinyl may suit certain small buildings, while steel or copper may be appropriate for particular requirements.
Your materials may include gutter sections, hangers, end caps, corners, outlets, downspouts, elbows, compatible fasteners, and the sealants or gaskets specified by the manufacturer. Seamless gutters normally require specialist forming equipment and are often installed by professionals.
Step 1: Measure the Roofline
Measure each roof edge that requires a gutter and record the length separately. Include porches, garages, extensions, and other roof sections where drainage is needed.
The building’s floor area does not directly tell you how much guttering to buy. Roof overhangs, multiple levels, and architectural features affect the total length. Corners and downspout positions also influence the number of fittings required.
Sketch the roofline and mark each gutter run, corner, and planned downspout. Indicate the direction in which water should travel along each run. This makes it easier to plan the slope and calculate materials.
Measure carefully before ordering. If the roof has unusual geometry or multiple stories, a professional measurement can prevent costly errors and unnecessary waste.
Step 2: Choose the Right Gutter Material
Aluminum Gutters
Aluminum is a common residential choice because it is relatively lightweight, available in many colors, and resistant to ordinary rust. It can be supplied in sectional lengths or formed into seamless runs.
Its main limitations include denting from impacts and possible damage from ladders or branches. Compare product specifications and support requirements before purchasing.
Vinyl Gutters
Vinyl gutters are often inexpensive and straightforward to handle. They may suit smaller buildings, but performance depends on product quality, installation, and climate.
Some products can become brittle or deform under certain temperature conditions. Check the manufacturer’s guidance before choosing vinyl for a climate with significant temperature extremes.
Steel and Copper Gutters
Steel may be selected for strength, while copper is often chosen for its distinctive appearance. Both have different installation and cost requirements from basic aluminum systems.
Steel needs suitable corrosion protection, and copper generally costs more. Confirm that fasteners and adjacent materials are compatible with the selected gutter system.
Step 3: Plan the Gutter Slope
Gutters need a suitable slope toward their outlets so water can drain instead of collecting in the channel. The correct amount of fall depends on the product and manufacturer instructions.
Mark the high and low points before installing supports. Use an appropriate level or layout tool to create a consistent line. Avoid relying only on visual judgment, because a gutter can appear straight while retaining water.
Long runs may need multiple outlets or a different drainage arrangement. The design must also account for roof area and expected rainfall. A gutter that is too small can overflow even when its slope is correct.
Step 4: Mark the Installation Line
Transfer your planned slope and support locations to the fascia or approved mounting surface. Mark the positions of the first and last hangers, intermediate supports, corners, and outlets.
Follow the manufacturer’s requirements for hanger spacing and fasteners. The correct spacing can vary according to the system, material, expected loads, and local weather conditions.
Check the mounting surface before drilling. Fasteners must attach to sound material rather than loose trim or rotten timber. Repair damaged fascia before proceeding.
Step 5: Install the Hangers
Hangers support the gutter and transfer its weight to the building. They need to withstand the system’s weight as well as the water and debris it may collect.
Use hangers designed for the selected gutter profile. Install them according to the specified spacing and fastening method. Do not assume that old brackets or holes are suitable for a new system.
Check alignment as you work so the supports follow the planned slope. If the fascia is uneven or damaged, address the mounting problem rather than trying to compensate by forcing the gutter into position.
Step 6: Fit the Gutter Sections
Place the gutter sections onto the supports according to the manufacturer’s instructions. Check that each section is aligned before securing the entire run.
For sectional systems, use the specified connectors, gaskets, or sealant. Some systems require particular joining methods, and generic sealants may not be compatible with every material.
Fit corners and end caps carefully because these joints are common locations for leaks. Allow for the movement specified by the manufacturer, especially with materials that expand and contract as temperatures change.
Use suitable cutting tools and remove metal debris after cutting. Protect the finished surface from scratches, and avoid leaving sharp edges exposed.
Step 7: Install Downspouts
Downspouts carry water from the gutter to the ground or another approved drainage destination. Their position should match the roof layout, expected rainfall, and available discharge routes.
Fit the outlet according to the manufacturer’s method, then connect the downspout and any necessary elbows. Secure the downspout to the building using appropriate straps or brackets.
Direct water away from the foundation. Depending on the property, a splash block, extension, or approved drainage connection may be suitable. Avoid discharging water where it can erode soil, flood walkways, or create hazards.
Check local requirements before connecting a downspout to underground drainage. Not every connection is permitted or appropriate for every property.
Step 8: Check Joints and Finish the Installation
Inspect joints, corners, end caps, outlets, and supports once the gutter is fitted. Use only the gaskets, fasteners, and sealants specified for the selected system.
Look along the full run for sagging, twisting, gaps, or sections that do not follow the intended slope. Confirm that supports are secure and that downspouts connect properly.
Remove packaging, metal shavings, and other debris. Leftover fragments can stain surfaces or obstruct drainage. Do not lean ladders or heavy tools against unsupported gutter sections.
Step 9: Test the System
When conditions are safe, introduce a controlled flow of water into the gutter and observe how it drains. Look for standing water, leaking joints, overflow around corners, and water escaping near outlets.
Check that the downspouts carry water freely and that discharge occurs away from the foundation. Do not climb onto a wet roof or use an unsafe method to conduct the test.
If water remains in a section, investigate slope, sagging supports, obstructions, or outlet problems. If a joint leaks, follow the manufacturer’s repair instructions rather than applying random sealant over the outside.
Common Gutter Installation Mistakes
Incorrect slope can leave standing water in the gutter. Supports that are too far apart may allow the gutter to sag under load. Poorly positioned downspouts can cause overflow or discharge water too close to the foundation.
Another mistake is ignoring damaged fascia. New gutters will not remain secure if the mounting surface is rotten or loose.
Avoid choosing a gutter size based only on appearance. Roof area, rainfall, and outlet capacity influence drainage performance. If the existing system repeatedly overflowed, have the design assessed before installing a replacement.
When to Hire a Professional
DIY installation may be reasonable for a small, accessible structure, but working at height presents serious risks. Long gutter sections can also be awkward to control, especially in windy conditions.
Professional installation is often preferable for multi-story homes, steep roofs, complex rooflines, seamless systems, or projects requiring fascia repairs. Contractors can assess the drainage layout and use appropriate access equipment.
Ask for a written estimate that identifies the material, profile, downspout locations, removal work, repairs, and warranty coverage. Check relevant experience, insurance, and local licensing requirements.
Conclusion
Installing gutters correctly helps protect the home by directing rainwater away from the roof edge and foundation. The job requires accurate measurements, compatible materials, an appropriate slope, secure supports, and carefully positioned downspouts.
A simple DIY installation may be manageable on a low, accessible building, but safety and the condition of the mounting surface should guide your decision. Follow the manufacturer’s instructions, test the drainage system, and maintain the gutters regularly.
Frequently Asked Questions
1. Can I install gutters myself?
Yes, some homeowners can install gutters on simple, accessible buildings. Multi-story roofs, steep access, and complex systems may require professional help.
2. How much slope do gutters need?
The correct slope depends on the gutter system and manufacturer. Follow the product’s specifications rather than assuming one measurement suits every installation.
3. What is a good gutter material for DIY projects?
Aluminum sectional gutters are a common choice because they are relatively lightweight and widely available. Climate, product quality, and installation requirements still matter.
4. Where should downspouts discharge water?
They should direct water away from the foundation and avoid erosion, flooding, and hazards. The correct arrangement depends on grading and local drainage requirements.
5. How often should gutters be cleaned?
It depends on nearby trees, roof debris, and weather. Inspect regularly and clean the system whenever debris begins to restrict water flow.
Leave a Reply