Tag: Home Maintenance

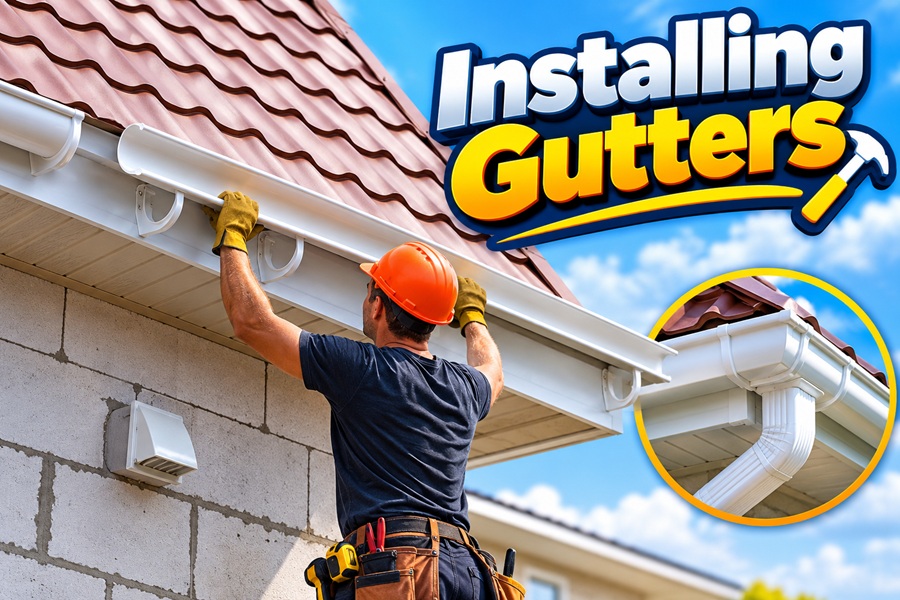
  • Installing Gutters: A Practical Step-by-Step Guide for Homeowners

    Installing Gutters: A Practical Step-by-Step Guide for Homeowners

    Gutters do an important job that homeowners often overlook until rainwater begins spilling over the roof edge. Uncontrolled runoff can erode soil, stain siding, damage landscaping, and allow water to collect near the foundation. Installing gutters gives rainwater a defined path from the roof into downspouts and away from vulnerable areas around the house.

    A straightforward installation may be manageable for a homeowner with suitable tools and experience working safely on an accessible, single-story building. The process involves measuring the roofline, selecting compatible materials, planning the slope, positioning hangers, fitting gutter sections, and directing water to an appropriate discharge point. More complicated roofs, multi-story homes, and installations involving structural repairs often justify professional help. Accurate measurements, secure fastening, and safe working practices matter just as much as choosing the right gutter material.

    Installing Gutters at a Glance

    Step Task Why it matters
    1 Inspect the roof edge Confirms the mounting surface is sound
    2 Measure the roofline Helps calculate material quantities
    3 Choose the gutter system Ensures suitable performance and compatibility
    4 Plan the slope Directs water toward outlets
    5 Mark the installation line Keeps the gutter aligned
    6 Fit hangers and sections Provides secure support
    7 Install corners and outlets Connects the drainage route
    8 Attach downspouts Carries water away from the roof
    9 Test the system Reveals leaks and drainage problems

    What You Need Before Installing Gutters

    Begin by inspecting the roof edge and the surface where the gutter will attach. Look for loose boards, water stains, peeling paint, rot, and signs that the old gutter has pulled away from the building.

    Do not attach a new system to damaged fascia without addressing the underlying problem. Fascia is the board or finishing surface along the roof edge that commonly supports gutter brackets. If it is rotten or loose, the new system may not remain secure.

    Choose the gutter material and profile based on the building and local conditions. Aluminum is popular for residential projects because it is lightweight and available in different finishes. Vinyl may suit certain small buildings, while steel or copper may be appropriate for particular requirements.

    Your materials may include gutter sections, hangers, end caps, corners, outlets, downspouts, elbows, compatible fasteners, and the sealants or gaskets specified by the manufacturer. Seamless gutters normally require specialist forming equipment and are often installed by professionals.

    Step 1: Measure the Roofline

    Measure each roof edge that requires a gutter and record the length separately. Include porches, garages, extensions, and other roof sections where drainage is needed.

    The building’s floor area does not directly tell you how much guttering to buy. Roof overhangs, multiple levels, and architectural features affect the total length. Corners and downspout positions also influence the number of fittings required.

    Sketch the roofline and mark each gutter run, corner, and planned downspout. Indicate the direction in which water should travel along each run. This makes it easier to plan the slope and calculate materials.

    Measure carefully before ordering. If the roof has unusual geometry or multiple stories, a professional measurement can prevent costly errors and unnecessary waste.

    Step 2: Choose the Right Gutter Material

    Aluminum Gutters

    Aluminum is a common residential choice because it is relatively lightweight, available in many colors, and resistant to ordinary rust. It can be supplied in sectional lengths or formed into seamless runs.

    Its main limitations include denting from impacts and possible damage from ladders or branches. Compare product specifications and support requirements before purchasing.

    Vinyl Gutters

    Vinyl gutters are often inexpensive and straightforward to handle. They may suit smaller buildings, but performance depends on product quality, installation, and climate.

    Some products can become brittle or deform under certain temperature conditions. Check the manufacturer’s guidance before choosing vinyl for a climate with significant temperature extremes.

    Steel and Copper Gutters

    Steel may be selected for strength, while copper is often chosen for its distinctive appearance. Both have different installation and cost requirements from basic aluminum systems.

    Steel needs suitable corrosion protection, and copper generally costs more. Confirm that fasteners and adjacent materials are compatible with the selected gutter system.

    Step 3: Plan the Gutter Slope

    Gutters need a suitable slope toward their outlets so water can drain instead of collecting in the channel. The correct amount of fall depends on the product and manufacturer instructions.

    Mark the high and low points before installing supports. Use an appropriate level or layout tool to create a consistent line. Avoid relying only on visual judgment, because a gutter can appear straight while retaining water.

    Long runs may need multiple outlets or a different drainage arrangement. The design must also account for roof area and expected rainfall. A gutter that is too small can overflow even when its slope is correct.

    Step 4: Mark the Installation Line

    Transfer your planned slope and support locations to the fascia or approved mounting surface. Mark the positions of the first and last hangers, intermediate supports, corners, and outlets.

    Follow the manufacturer’s requirements for hanger spacing and fasteners. The correct spacing can vary according to the system, material, expected loads, and local weather conditions.

    Check the mounting surface before drilling. Fasteners must attach to sound material rather than loose trim or rotten timber. Repair damaged fascia before proceeding.

    Step 5: Install the Hangers

    Hangers support the gutter and transfer its weight to the building. They need to withstand the system’s weight as well as the water and debris it may collect.

    Use hangers designed for the selected gutter profile. Install them according to the specified spacing and fastening method. Do not assume that old brackets or holes are suitable for a new system.

    Check alignment as you work so the supports follow the planned slope. If the fascia is uneven or damaged, address the mounting problem rather than trying to compensate by forcing the gutter into position.

    Step 6: Fit the Gutter Sections

    Place the gutter sections onto the supports according to the manufacturer’s instructions. Check that each section is aligned before securing the entire run.

    For sectional systems, use the specified connectors, gaskets, or sealant. Some systems require particular joining methods, and generic sealants may not be compatible with every material.

    Fit corners and end caps carefully because these joints are common locations for leaks. Allow for the movement specified by the manufacturer, especially with materials that expand and contract as temperatures change.

    Use suitable cutting tools and remove metal debris after cutting. Protect the finished surface from scratches, and avoid leaving sharp edges exposed.

    Step 7: Install Downspouts

    Downspouts carry water from the gutter to the ground or another approved drainage destination. Their position should match the roof layout, expected rainfall, and available discharge routes.

    Fit the outlet according to the manufacturer’s method, then connect the downspout and any necessary elbows. Secure the downspout to the building using appropriate straps or brackets.

    Direct water away from the foundation. Depending on the property, a splash block, extension, or approved drainage connection may be suitable. Avoid discharging water where it can erode soil, flood walkways, or create hazards.

    Check local requirements before connecting a downspout to underground drainage. Not every connection is permitted or appropriate for every property.

    Step 8: Check Joints and Finish the Installation

    Inspect joints, corners, end caps, outlets, and supports once the gutter is fitted. Use only the gaskets, fasteners, and sealants specified for the selected system.

    Look along the full run for sagging, twisting, gaps, or sections that do not follow the intended slope. Confirm that supports are secure and that downspouts connect properly.

    Remove packaging, metal shavings, and other debris. Leftover fragments can stain surfaces or obstruct drainage. Do not lean ladders or heavy tools against unsupported gutter sections.

    Step 9: Test the System

    When conditions are safe, introduce a controlled flow of water into the gutter and observe how it drains. Look for standing water, leaking joints, overflow around corners, and water escaping near outlets.

    Check that the downspouts carry water freely and that discharge occurs away from the foundation. Do not climb onto a wet roof or use an unsafe method to conduct the test.

    If water remains in a section, investigate slope, sagging supports, obstructions, or outlet problems. If a joint leaks, follow the manufacturer’s repair instructions rather than applying random sealant over the outside.

    Common Gutter Installation Mistakes

    Incorrect slope can leave standing water in the gutter. Supports that are too far apart may allow the gutter to sag under load. Poorly positioned downspouts can cause overflow or discharge water too close to the foundation.

    Another mistake is ignoring damaged fascia. New gutters will not remain secure if the mounting surface is rotten or loose.

    Avoid choosing a gutter size based only on appearance. Roof area, rainfall, and outlet capacity influence drainage performance. If the existing system repeatedly overflowed, have the design assessed before installing a replacement.

    When to Hire a Professional

    DIY installation may be reasonable for a small, accessible structure, but working at height presents serious risks. Long gutter sections can also be awkward to control, especially in windy conditions.

    Professional installation is often preferable for multi-story homes, steep roofs, complex rooflines, seamless systems, or projects requiring fascia repairs. Contractors can assess the drainage layout and use appropriate access equipment.

    Ask for a written estimate that identifies the material, profile, downspout locations, removal work, repairs, and warranty coverage. Check relevant experience, insurance, and local licensing requirements.

    Conclusion

    Installing gutters correctly helps protect the home by directing rainwater away from the roof edge and foundation. The job requires accurate measurements, compatible materials, an appropriate slope, secure supports, and carefully positioned downspouts.

    A simple DIY installation may be manageable on a low, accessible building, but safety and the condition of the mounting surface should guide your decision. Follow the manufacturer’s instructions, test the drainage system, and maintain the gutters regularly.

    Frequently Asked Questions

    1. Can I install gutters myself?

    Yes, some homeowners can install gutters on simple, accessible buildings. Multi-story roofs, steep access, and complex systems may require professional help.

    2. How much slope do gutters need?

    The correct slope depends on the gutter system and manufacturer. Follow the product’s specifications rather than assuming one measurement suits every installation.

    3. What is a good gutter material for DIY projects?

    Aluminum sectional gutters are a common choice because they are relatively lightweight and widely available. Climate, product quality, and installation requirements still matter.

    4. Where should downspouts discharge water?

    They should direct water away from the foundation and avoid erosion, flooding, and hazards. The correct arrangement depends on grading and local drainage requirements.

    5. How often should gutters be cleaned?

    It depends on nearby trees, roof debris, and weather. Inspect regularly and clean the system whenever debris begins to restrict water flow.
  • Emergency HVAC Repair: Warning Signs, Costs, and What to Do

    Emergency HVAC Repair: Warning Signs, Costs, and What to Do

    Heating and cooling systems tend to fail when you need them most. An air conditioner may stop working during a heatwave, or a furnace might quit on a freezing night. Some faults are inconvenient but can wait for a scheduled appointment. Others create safety risks, threaten vulnerable occupants, or lead to property damage if left unresolved. Emergency HVAC repair helps homeowners respond when heating, ventilation, or air conditioning equipment fails unexpectedly and requires urgent professional attention.

    The correct response depends on the symptoms. A thermostat setting that needs adjustment is different from smoke, suspected gas leakage, electrical sparks, or a carbon monoxide alarm. Start by protecting people and avoiding dangerous troubleshooting. If you suspect a gas leak, notice smoke, or hear a carbon monoxide alarm, leave the affected area and contact the appropriate emergency service from a safe location. Once immediate hazards are addressed, a qualified HVAC technician can inspect the equipment, identify the fault, and explain the safest repair options.

    Emergency HVAC Repair at a Glance

    Problem Recommended response
    Smoke, sparks, or burning odor Stop using the system if safe and seek urgent assistance
    Suspected gas leak Leave immediately and contact the gas emergency service from a safe location
    Carbon monoxide alarm Move outside and contact emergency services
    No heating during severe cold Arrange urgent service, especially for vulnerable occupants
    No cooling during dangerous heat Seek urgent help and move to a cooler location if needed
    Water leaking from equipment Shut down the affected system if safe and arrange inspection
    Loud or unusual mechanical noises Stop operation if damage is suspected and request diagnosis
    Thermostat not responding Check basic settings before arranging service

    What Counts as an HVAC Emergency?

    An HVAC emergency is a failure that creates an immediate safety concern, threatens essential indoor conditions, or could cause substantial property damage.

    A furnace that stops working during freezing weather may require urgent attention, especially if indoor temperatures are falling rapidly. An air conditioner that fails during extreme heat may also become an urgent problem for older adults, infants, or people with medical conditions.

    Smoke, sparks, suspected gas leakage, and carbon monoxide alarms should never be treated as routine maintenance issues. Follow emergency safety guidance rather than opening the equipment or attempting a repair.

    Water leaking from an indoor air-conditioning unit may also need prompt attention if it threatens electrical equipment, ceilings, flooring, or walls. Stop the affected equipment if safe, keep away from electrical hazards, and arrange professional inspection.

    Common Reasons for Emergency HVAC Repair

    Air Conditioner Failure During Extreme Heat

    A sudden loss of cooling can make a home uncomfortable and potentially unsafe during a heatwave. If indoor temperatures rise quickly, move vulnerable occupants to a cooler location while arranging service.

    Start with simple checks. Confirm that the thermostat is set to cooling, the temperature setting is appropriate, and the system has power. You may inspect an accessible filter, but do not remove electrical covers or handle wiring.

    If the system still fails, a technician may need to investigate a motor problem, electrical fault, failed capacitor, refrigerant issue, blocked condensate drain, or control malfunction. These faults require different repairs, so the symptoms alone cannot establish the exact cause.

    Furnace Failure in Cold Weather

    A furnace failure can become serious when outdoor temperatures are low and indoor spaces begin losing heat. The risk increases for households with vulnerable occupants or plumbing that may freeze.

    Check the thermostat and normal power supply. If the air filter is accessible, inspect it for heavy blockage. Do not remove furnace panels, bypass safety switches, or attempt repairs involving gas lines or electrical connections.

    If you smell gas, leave the property immediately and contact the appropriate emergency service from a safe location. If a carbon monoxide alarm activates, get outside and seek emergency assistance.

    Unusual Noises

    Sudden grinding, banging, screeching, or repeated clicking may indicate a mechanical or electrical problem. Some equipment makes normal startup sounds, but a new or unusually loud noise deserves attention.

    Stop the system if it vibrates heavily, emits smoke, or appears damaged. Continuing to operate faulty equipment may worsen the problem.

    Tell the technician when the noise occurs, such as during startup, while the fan runs, or when the system shuts down. This information can help narrow the diagnostic process.

    Water Leaks

    Air conditioners and heat pumps can produce condensate during normal operation. Water should leave through the designed drainage route. A blocked drain, damaged pan, or disconnected pipe may cause leakage.

    If water is near electrical components, do not touch the affected equipment. Shut the system off only if it is safe to do so, protect nearby belongings where practical, and arrange service.

    Persistent moisture can damage ceilings, walls, insulation, and flooring. A technician should identify the source rather than simply removing visible water and restarting the system.

    What to Do Before the Technician Arrives

    First, determine whether anyone is in immediate danger. Gas leaks, carbon monoxide alarms, smoke, and electrical hazards require immediate safety action.

    If there is no immediate hazard, record the symptoms. Note when the problem started, whether the system runs continuously, what noises it makes, and whether an error code appears on the thermostat or equipment display. Photograph a visible code only if you can do so safely.

    Check basic settings without dismantling the system. Confirm the selected mode, thermostat setting, and normal power supply. Do not repeatedly reset a breaker that trips again or attempt to force damaged equipment to operate.

    Clear safe access to the indoor unit, outdoor equipment, or furnace. Gather the model number, equipment age, previous repair records, and warranty information if available.

    How Much Does Emergency HVAC Repair Cost?

    Costs depend on the fault, equipment type, location, time of day, parts availability, and labor requirements. A simple repair may cost considerably less than replacing a compressor, control board, or other expensive component.

    As a broad U.S. planning guide, service calls and simpler repairs may cost approximately $100 to $500, while complex emergency repairs can exceed $1,000. These are illustrative ranges rather than current local quotes. After-hours fees, specialized parts, and difficult access can increase the total.

    Cost factor Why it matters
    Emergency call-out fee Covers urgent dispatch
    Time of service Nights, weekends, and holidays may cost more
    Diagnosis Technician time is needed to identify the fault
    Parts Prices vary by model and component
    Labor Complex repairs take longer
    Refrigerant work Requires appropriate equipment and qualified handling
    Equipment age Older parts may be difficult to source
    Additional damage Secondary faults may increase the scope

    Ask for an itemized estimate covering diagnosis, labor, parts, and additional fees. If the situation is safe to manage temporarily, ask the technician to explain the fault and available options before authorizing expensive work.

    Choosing a Reliable Emergency HVAC Company

    Look for a company that clearly explains its emergency availability, service area, and dispatch charges. Ask whether technicians are available at the time you need help and how quickly they can realistically arrive.

    Check relevant qualifications, insurance, and licensing requirements for your location. HVAC work may involve electricity, combustion equipment, refrigerants, and specialized diagnostic procedures.

    Confirm that the company services your equipment type and brand. Older or specialized systems may require parts that are not immediately available.

    A reliable provider should explain the diagnosis, proposed repair, costs, and warranty terms. Avoid choosing only by the lowest advertised call-out fee. Accurate diagnosis and safe workmanship matter just as much as the initial price.

    Repair or Replace Your HVAC System?

    Repair may be reasonable when the equipment is relatively young, the fault is limited, and replacement parts are available. Replacement may deserve consideration when the system is old, failures keep recurring, parts are difficult to obtain, or repair costs approach the price of a new unit.

    Consider repair history, energy performance, equipment condition, warranty coverage, and the likely cost of future maintenance. One expensive repair does not automatically mean replacement is the better choice, but repeated breakdowns can change the calculation.

    Ask the technician to separate the immediate repair from any longer-term recommendations. A safe repair may restore operation while giving you time to compare replacement options.

    Preventing Future HVAC Emergencies

    Routine maintenance can identify developing problems before the system fails during extreme weather. Depending on the equipment, maintenance may include checking filters, airflow, electrical components, condensate drainage, controls, and overall operation.

    Replace or clean filters according to the manufacturer’s instructions. Dust, pets, renovation work, and heavy use can make filters dirty more quickly.

    Keep the area around outdoor equipment clear of leaves and other obstructions. Do not block ventilation openings or access panels. If you notice unusual noises, recurring breaker trips, water leaks, or inconsistent heating and cooling, arrange an assessment before the problem becomes urgent.

    Seasonal service can be useful before peak heating and cooling periods. Maintenance cannot prevent every failure, but it can reduce avoidable breakdowns and help the equipment operate as intended.

    Conclusion

    Emergency HVAC repair is important when a heating or cooling failure creates a safety concern, threatens essential indoor conditions, or risks property damage. Recognizing dangerous symptoms and responding appropriately should always come before troubleshooting.

    For less urgent faults, check only basic settings, document the symptoms, and contact a qualified technician. Ask about call-out charges, diagnosis, parts, labor, and warranty coverage.

    Regular maintenance and early attention to unusual noises, leaks, and performance changes can reduce the risk of unexpected failures. When an emergency occurs, clear information and a reliable repair professional can help you reach a safer solution.

    Frequently Asked Questions

    1. When should I call for emergency HVAC repair?

    Call urgently when a failure creates a serious safety concern, threatens vulnerable occupants during extreme temperatures, or causes significant leakage. Gas leaks, carbon monoxide alarms, smoke, and electrical hazards require immediate safety action.

    2. How much does emergency HVAC repair cost?

    A broad U.S. planning range for many service calls and simpler repairs is around $100 to $500, while complex repairs may exceed $1,000. Actual costs vary by location and fault.

    3. Can I troubleshoot my HVAC system myself?

    You can check basic thermostat settings and accessible filters if it is safe. Do not open electrical compartments, handle refrigerant, bypass safety devices, or repair gas equipment.

    4. Is emergency HVAC service more expensive at night?

    Many providers charge additional fees for nights, weekends, holidays, or urgent dispatch. Ask about the fee and estimated costs when circumstances allow.

    5. Should I repair or replace my HVAC system?

    Consider equipment age, repair history, fault severity, parts availability, and replacement cost. Ask for a clear diagnosis and compare the immediate repair with longer-term ownership costs.